How to Install a Range Hood Over an Island
Need a challenging yet completely doable and rewarding DIY project for the upcoming weekend? We’ve got you covered with this guide to installing a range hood over an island. Follow these 12 steps to nail the installation process. You can also watch the how-to video for a closer look at the process.

Step 1: Gather the materials
Before starting the installation, gather all the necessary materials and ensure everything is in good condition.
Check for any scratches or damages to the kitchen island range hood and its components. Additionally, make sure you have the required tools, including a drywall saw, screws, tape, duct tape, zip ties, level, and a drill.
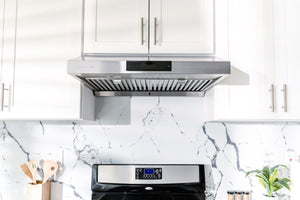
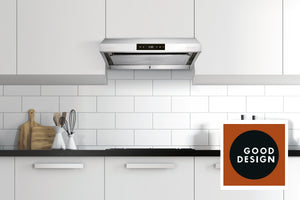
Sleek Island Range Hoods
From Hauslane
Step 2: Test the kitchen range hood
Before mounting the range hood, test it to make sure all the functions work correctly.
Plug it into a power source and turn on the lights and fan to ensure everything is in working order.
Step 3: Mount the main bracket
The main bracket holds the body of the range hood and creates the structure that supports it.
Determine the dead center of the island where you want to install the range hood. Many range hood kits come with paper templates that help with positioning. Use these templates to mark the exact position on the ceiling where the main bracket will be mounted.
Step 4: Use a level and assistance
Ensuring that the range hood is level is crucial for a successful installation.
To do this, use a level and an assistant to hold it steady while you mark the positions and make adjustments. By using a level, you can compensate for any imperfections in the walls.
Step 5: Cut an opening for the vent
Using the marked center point, cut out the circular opening in the ceiling for the vent.
Use a drywall saw or a handheld drywall cutter to make the necessary opening for the duct.
Step 6: Add framing for support
Measure the distance between the studs and install bracing accordingly.
If you find that there are no studs in the area where you need support, you may need to add framing in the attic to provide a secure mount for the range hood.
Step 7: Determine the height
The height at which the range hood is installed is important for both functionality and aesthetics.
Research suggests a height range of 26 to 30 inches above the cooking surface for optimal performance. Use this range as a guide to determine the most suitable height for your range hood.
Step 8: Assemble the chimney
The chimney of the range hood adds to the overall height and appearance.
Assemble the chimney components based on the manufacturer's instructions. Consider using just one chimney if it allows you to achieve the desired height without obstruction.
Step 9: Connect the vent
Drop down a vent from the ceiling to connect the range hood's ductwork.
Ensure that the vent is properly aligned and secured.
Step 10: Attach the kitchen island range hood
With the main bracket securely mounted, slide the finished chimney over it.
Lift the range hood and connect it to the vent. Use screws to attach the range hood to the ceiling through the face of the chimney. Be mindful of the placement of screws to minimize their visibility.
Step 11: Evaluate and make adjustments
Once the range hood is installed, step back and evaluate the overall appearance.
Assess whether any adjustments are needed to achieve the desired height and aesthetics. If necessary, make alterations to the chimney to improve the visual appeal.
Step 12: Finalize the installation
After ensuring everything is in place, secure, and looks satisfactory, test the range hood again to ensure all functions are working correctly.
Congratulations! You have successfully installed a range hood over your kitchen island.
Remember, the process of installing a range hood can vary depending on the specific model and manufacturer. Always follow the instructions provided by the manufacturer for your particular range hood.
By following these steps and using the video as a reference, you can successfully build a custom range hood with a range hood insert, creating a unique and functional centerpiece for your kitchen. Enjoy the satisfaction of a job well done and the improved ventilation in your culinary space!
Related Posts